

Ok, I know I'm doing a 'Monday Make' on a Friday, but it's been a busy week! I've been in Stuttgart attending an author's workshop for my other job as a writer (I know - so adult!) but I've since returned and, having caught up on all my orders, now have a chance to type up this post, propped up in bed surrounded by assorted German chocolates and Hasselnusswaffeln crumbs. Yum.
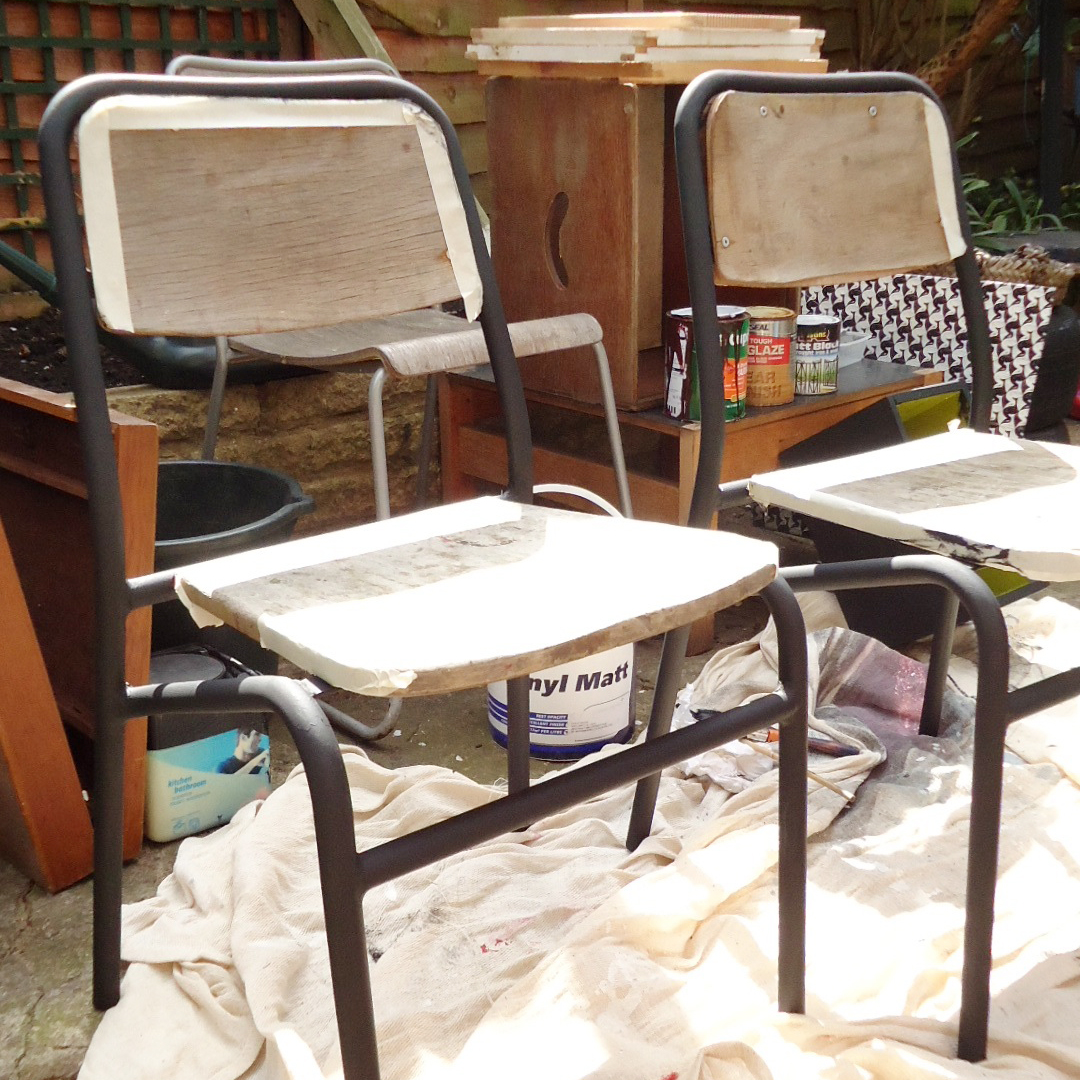
Onto the craftiness! Question. What could be better than an amazingly crafty individual? Answer. An awesome crafty couple! This post is dedicated to my lovely housemates, Yeshen (photographer) and Natasha (illustrator/animator), who on Monday decided to decoupage a couple of old chairs we had lying around in our back garden. Here's a step-by-step guide to how they did it.
Things you need include:
Two old chairs. Ours were the kind with a metal frame and a wooden back and seat
An assortment of pictures to stick on your chairs
Scissors, if you want to cut out the pictures
Wallpaper paste
An old container to mix up your paste in
A stick to mix the paste with
A paintbrush
Laquer/varnish
Paint/masking tape (optional)
Process:
Take your chairs and wipe them down with a damp cloth to remove dirt/dust/debris. Allow to dry.

These were a bit old and rusty so the guys decided to paint the metal bits with matt black paint.
 |
| Rusty chair leg, nice ship :o) |
 |
| To keep things neat it helps to mask off the edges with tape... |
Next, assemble your collection of papery bits. This can include pages from a magazine, photocopies, posters, postcards, stickers, photos and maps, for example.


Decide if you want neatly cut edges or if you prefer a more spontaneous-looking torn edge effect, or a mixture of both.


This is where your wallpaper paste comes into action. In your plastic container, mix the powder with water according to the instructions on the packet. Stir with your wooden sick to remove lumps. Make a tad more mix than you think you'll need to save you from having to fuss around later on.


Start positioning your artworks onto the chair seat in a way that is aesthetically pleasing to you. Take your paintbrush and load it up with the wallpaper paste. Brush a coat over the pictures one by one to seal them to the surface. Keep repeating this process, overlapping the pictures and filling in all the empty spaces.
 |
| Hehehe, that tickles |

Here is the decoupage duo in action:
 |
| Go team. |
 |
| Tash art directs while Yesh does the hard graft ;o) |
Here are some helpful tips to bear in mind:
 |
| Curve the pictures around the edges for a seamless finish |
 |
| Periodically sponge off excess paste to avoid the paper getting too soggy and tearing |
 |
| Mould the paper around the corner with your fingers and press out any creases or air bubbles |
When you've covered the whole seat and are happy with your picture placement, allow the wallpaper paste to dry.

Give a once over with a varnish or laquer to seal your handiwork in place and allow to dry once more.

And that's it! Admire your DIY savvy. Who needs Ikea when you've got creativity?

 |
| This guy seems pleased with the result... |
 |
Well done Yesh/Tash, you guys rock!
See you next Monday for another 'Make'...
Love Leanne xx
Chi Chi Dee handmade
See you next Monday for another 'Make'...
Love Leanne xx
Chi Chi Dee handmade

I LOVE THIS CHAIRS!!!
ReplyDeleteSorry for my English, I am a Spanish girl and do not speak very much English. I like very much the chairs and the paper that you use. I also have blog, you can visit it if you want:
http://queliodehilo.wordpress.com/
I hope you liked it
Hi Irina,
ReplyDeleteThanks for your comment :o) I checked out your blog too, very nice! Greetings from London, love Leanne xx
This comment has been removed by a blog administrator.
ReplyDelete